Showing posts with label recipe. Show all posts

Friday, October 17, 2014

Cubicle kitchen: Traditional Shortbread with Earl Grey Glaze

Okay, everyone.  I promise, I really did go to the UK.  It was not a dream, nor was it a extreme fib to excuse a blogging break.  I was there for a relatively few short days, and I filled those days with lovely walks in the park, yummy food, a little culture and of course a few yarn stores.

I still hope to share some photos from my trip in later posts.  But to prove my point, here is just one from another 'of course'.  At least it was an of course for me.  Because when I would visit my grandparents for weeks at a time during the summer when I was a kid, Hamley's, the seven-story toy store, was always high on my list of places I had to go to.  So even as a twenty-something, I have to have a wander around.

Though I was able to keep myself from buying any toys, I did snap some photos of these excellent Lego displays:
First, the Queen and one of her Corgis, and then Prince William and Kate doing the wedding wave alongside Charles and Harry.  There you have it, proof that I was there less than three years ago.

Further circumstantial evidence could be taken by the fact that the first klatch treat I made after the trip was shortbread with a tea glaze.  What can I say, I was feeling British.  These are excellent for enjoying with your tea, which should of course be drunk out of some Royal Wedding china.


Traditional Shortbread with Earl Grey Glaze

Ingredients

Directions
  1. In a cup or small bowl, sift powdered sugar.  Add tea and use a fork to mix until you reach the desired consistency.  I look for it to easily flow from the tines of the fork, but not drip.
  2. Drizzle glaze over cooled and cut shortbread.  Allow to dry.

Tuesday, October 7, 2014

Cubicle kitchen: Whiskey Sour Cupcakes

I like to think of these as part of my rule-bending baked goods collection.  Because in my office, as I'm sure in most, you can't bring alcohol.  Unless it's a special morale-boosting event sponsored by department heads complete with beer and wine.

Now, I'm not a big drinker.  Some wine or a beer with dinner or a fancy drink with a cherry at happy hour.  Always assuming there are enough calories left in the day.  Otherwise, I've just personally never seen the point in being drunk.  Anyway, for happy hour, I've always been partial to Amaretto Sours.  Because sweet and sour are more appealing to me than the actual potency of the drink.  But amongst the random alcohol selection I was looking to use up (because we weren't drinking it), there was no amaretto.  So, whiskey it was.

No one turned down these corporate-policy-ambiguous Whiskey Sour Cupcakes.  Hopefully I didn't contribute to any poor afternoon decision-making in meetings after klatch, but you would need to put yourself into a sugar coma before you could make yourself drunk on these.  Having said that, though, they have a distinct smell and taste of alcohol.  Which is the point, being cocktail-inspired cupcakes after all.  The lemon in the cupcake is just a complement to the whiskey, but the frosting helps amp up the citrus and mellow out the alcohol.

Whiskey Sour Cupcakes
Adapted from bethcakes: Whiskey Sour Cupcakes

Ingredients
Cake:
  • 1 1/2 cups all-purpose flour
  • 1 teaspoon baking soda
  • 1/2 cup butter, room temperature
  • 3/4 cup sugar
  • 2 eggs
  • 1 teaspoon vanilla
  • 3/4 cup whiskey
  • 1/4 cup lemon juice
  • 2 teaspoons lemon zest
Frosting:
  • 3/4 cup butter, room temperature
  • 1/2 Tablespoon lemon juice
  • 1/2 Tablespoon grenadine
  • 1 teaspoon lemon extract
  • 1 1/2 cups powdered sugar
Directions
  1. Preheat oven to 350°.
  2. Sift together flour and baking soda in a separate bowl and set aside.
  3. In a large mixing bowl, cream together butter and sugar.  Add eggs, vanilla, and whiskey and mix until combined.
  4. Incorporate the flour mixture.  Add the lemon juice and zest.
  5. Fill liners 2/3 full.  Bake for 15-17 minutes, or until a toothpick inserted in the center comes out clean.  Allow to cool before frosting.
  6. Cream butter.  Add lemon juice, grenadine, and extract.
  7. Incorporate powdered sugar until desired consistency.
  8. Frost cakes.

Tuesday, August 26, 2014

Cubicle kitchen: Coffee Crunch Chocolate

Have you ever gone through the stages of weird food?  Like:

Stage One: Disgust.  You hear about some new thing, and you just think, 'Why would anyone ever want to eat that?  Gross.'
Stage Two: Curiosity.  You start to wonder just how bad it might taste.  And really, why would they make it if it really was so horrible?
Stage Three: Connecting.  You think about some other foods that you like that might have similar traits.
Stage Four: Craving.  You decide that you must try this thing.  Maybe it will be horrible, but by this point you start to believe that maybe, just maybe, it could be good.  And you wouldn't want to miss out on that, would you?
Stage Five: Tasting.  You actually get to taste it, and from there you might either fall in love with it, or perhaps you were right in the first place and it is the work of a flavor sadist.

I went through all five of these stages with the new Lays chips, specifically the Cappuccino flavor.  Coffee potato chips?  Huh?  But then, I made some intriguing connections.  After all, salty and sweet is an intriguing combination.  Kettle corn, for example, is delicious.  That thought, and stumbling upon the chips in an end cap at the grocery store, fulfilled the destiny of Stage Five.

The result?  I wouldn't say I'm obsessed, but they were good.  I found that while eating the chips themselves was intriguing, I preferred them with just a little bit of peanut butter.  I happened to have a jar of Vanilla Espresso Almond Butter, and it was the perfect 'dip', if you will.  It might also be yummy with one of those cream cheese fruit dips, maybe with some instant coffee flavor.  Something to round out the slight sweetness and bitterness of the chip.  And nut butter is great because it also has a complementary saltiness.

So there's a further Stage Six that I go through with these things, which is then to want to put them into a treat for klatch and share them with the world.  Combined with my almond butter, I thought that some kind of bark would be a simple way to keep the chips recognizable but turn them into something new.  Plus, I thought dark chocolate would play nicely with the other flavors.  And it did, this is just as good as all of those crazy chocolate bars I've seen all over the place, and everyone was very amused at my strange potato chip find.

This isn't a recipe that I expect a lot of people to recreate exactly.  But it's something you can certainly play around with.  Maybe just with plain potato chips and creamy peanut butter.  Or pretzels and cookie butter.  Whatever you find that intrigues you.  Push it all the way to Stage Six!
Coffee Crunch Chocolate

Ingredients

  • 36 ounces semisweet chocolate chips
  • 3/4 cup nut butter (I used a Vanilla Espresso-flavored almond butter)
  • 1 1/2 teaspoons strongly brewed coffee
  • 1/2 cup powdered sugar
  • About half a bag of Lays Cappuccino potato chips

Directions

  1. In a bowl, mix together nut butter, coffee, and powdered sugar.  Mixture will be crumbly, kind of like the inside of a Reese's cup.  Set aside.
  2. In a large glass bowl, melt a third of the chocolate chips by microwaving on medium power for about a minute at a time, stirring until totally smooth.
  3. Spread the melted chocolate onto a parchment paper lined cookie sheet.
  4. Sprinkle crumbles of half of the peanut butter mixture and crunch handfuls of chips onto the chocolate.
  5. Repeat the melting of chocolate, spreading, and topping sprinkling. (Note: You could also choose to do a single layer of 'toppings' if desired.)
  6. Melt the remaining chocolate and spread carefully.  Sprinkle additional potato chips as desired.
  7. Chill in fridge completely.  Break or cut into pieces.

Sunday, August 17, 2014

Cubicle kitchen: Cranberry Peach Thumbprints

Have you ever seen Gosford Park?  Remember the scene where one of the guests is found indulging in preserves straight from the jar after his interrogation?  This is a minute or two into it, but you can see that he's still tasting away while Dorothy gives a great little treatise:
Yes.  Yes to believing in love.  And yes to jam.

Everyone thinks of cranberries for Thanksgiving, but they are so tart and bright, they go very well with the summery peaches from my day trip to Fredericksburg a few weekends ago.  I don't know that it would be deemed appropriate for the inhabitants either upstairs or downstairs in an English country home, but it's very tasty.

I also really like this particular recipe for the thumbprint cookies.  Thank you, Martha Stewart.  It's the texture that makes them, from the crunchy sugar coating to their overall lightness.  They make these really taste like fresh, summer cookies, not an autumn dessert that forgot what month it was.  Although you could still make them for Thanksgiving as a surprise for the dessert table.  I have diced peaches in the freezer, so this could actually happen.

Cranberry Peach Thumbprints

For the jam:

Ingredients
  • 1 lb diced peaches
  • 4 oz cranberries
  • 1/2 brown sugar Splenda
  • 1 Tablespoon lemon juice
  • 1 Tablespoon orange juice
Directions
  1. Mix together all ingredients in a microwave-safe bowl.
  2. Microwave in 8-minute intervals, stirring after each interval, for a total of 24 minutes cooking time.
  3. The mixture should be thick and jammy.  If necessary, microwave for a few more minutes.
  4. Allow to cool, then set aside.  Can be stored in a container in the fridge for about a week.

To make the thumbprint cookies:
Follow the recipe from Martha Stewart: Shira's Cranberry Thumbprint, substituting your jam for Martha's filling.  You should have some leftover jam.

Tuesday, August 12, 2014

Cubicle kitchen: Blueberry Cupcake Cones

I always think its kind of perverse that just when the rest of the country seems to have decided that it's fall, based on the back to school ads and slow introduction of autumnal items in the stores, Texas is actually ramping up the hottest weather of the summer.  I suppose I should just be grateful that I haven't seen any Halloween costumes out yet, although I am looking forward to pumpkin treats, like this one Dorothy from Crazy for Crust just posted.

But since it is most definitely still summer, I thought I would try my hand at putting a baker's spin on a classic summer treat with ice cream cone cupcakes.  I used one of my favorite tricks for moist and yummy cake from a boxed mix by using melted ice cream, which also went with the theme.  

Because of the sweetness of the cake and jam, I didn't sweeten the cream cheese frosting too aggressively, just a few cups of powdered sugar.  Instead of going with fancy piping, I thought using the ice cream scoop was simple but effective.  

Also simple but effective: microwaving  and mashing up fruit to make a quick jam.  You'll see this in another upcoming recipe, but I've now tried this with blueberries, grapefruit, and peaches and each one has worked pretty well.

One thing to keep in mind with these: I read varying reports on how long the cakes could be stored before serving, because the cones can turn sort of stale/soggy.  I baked them a day in advance of bringing them into the office and didn't frost until I was ready to serve.  I don't think staleness was an issue, if they were chewy it was just as much a factor as when they were freshly baked.

Blueberry Cupcake Cones
Frosting recipe adapted from Local Kitchen Blog: Jam + Cream Cheese Frosting

Ingredients

Jam
  • 3 cups blueberries
  • 1/2 cup sugar
  • 2 Tablespoons lemon juice
  • Dash dried lemon zest
Cake
  • 1 box Blue Raspberry cake mix
  • 3 eggs
  • 1 pint Blue Bell's Red, White & Blue ice cream, melted
  • 24 ice cream cones (not waffle or sugar)
Frosting
  • 1 lb (2 8 oz packages) Neufchatel cream cheese
  • 4 oz (1 stick) butter, softened
  • 1/4 cup jam (see above)
  • up to 1 lb powdered sugar
Directions

  1. Combine all jam ingredients in a microwaveable bowl.  Microwave for 10-12 minutes in 5 minute increments, stirring after each round.  When the mixture is thick and jammy, it's done.  Set aside.  Jam can be made days in advance and kept in a container in the fridge.
  2. Preheat oven to 350°.
  3. Stand cones up either in a pan specifically designed for the purpose or carefully in a mini muffin tin.  
  4. Mix all cake ingredients except cones in a large bowl until combined.
  5. Stand cones up either in a pan specifically designed for the purpose or carefully in a mini muffin tin.  Scoop batter into cones until half full.  (I had some leftover batter to make a few cupcakes on the side.)
  6. Bake for about 20 minutes, until a toothpick comes out clean.  Allow to cool.
  7. Cream together cream cheese and butter.  Add jam.
  8. Add sugar 1/2 cup at a time until you've reached the desired sweetness and consistency.
  9. When the cake has cooled completely, use an ice cream scoop to frost.  Spoon extra jam on top.

Tuesday, August 5, 2014

Cubicle kitchen: Red Berry Chocolate Peanut Butter Cereal Bars

In comparison to the rest of my library of books, my cookbook collection is actually quite small.  I'm occasionally seduced by the dishes in a particular book while browsing the shelves of Half Price Books.  But I often overlook cookbooks entirely when thinking about what I'm actually going to bake, turning instead to Chef Google.

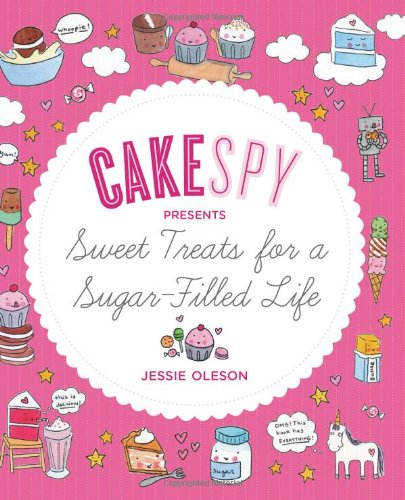
Last week I decided to turn the tables and instead flipped through one of my cookbooks before going out grocery shopping.  I chose CakeSpy's Sweet Treats for a Sugar-Filled Life.  Because I love her and her blog, and the book was calling to me in all of its pinkness.
I was lucky enough to find a recipe that used mostly ingredients that I already had on hand, some of which I was keen to use up.  And you're lucky too because it turns out that she published the same recipe online.  So you can make this too!

The only real changes I made to Jessie's recipe were substitutions, using cereal and peanut butter that included berries.  'Red Berries' to be precise according to the cereal box.  That feels like one of those terms they use on products to be deliberately evasive.  Like 'natural flavorings'.  What exactly are red berries?  As near as I can tell in the cereal it meant dehydrated strawberries.  I tossed in another berry which is technically red by using a Cranberry Crunch peanut butter.  If I were going to change things up even more, I might add some jam (raspberry, to round out the red berry cast?), maybe as a layer between the cereal and the chocolate.  Just to bump up the fruity factor.

I've also noted that I didn't have any issues with cutting these bars after refrigerating.  Which is true.  The only problem I had was that they tasted so good that I kept justifying the need for me to eat more 'scraps' by adjusting the size of the bars.  Like, 'Oh, this one looks too long, let's just cut a little bit off the end,' then, 'Oh, now it looks too wide, I'll just trim it down the side.'  And so on and so forth until the bars went from three to two bits, and now some of the leftovers have been further reduced to bite-sized.

Red Berry Chocolate Peanut Butter Cereal Bars
Recipe from CakeSpy: Chocolate Peanut Butter Special K Bars

My notes:
  • Substitutions: Special K with Red Berries (generic brand) rather than original, Planters' Cranberry Crunch peanut butter in addition to regular creamy
  • The recipe used up enough of the box of cereal that I went ahead and finished it off, adding a little extra cereal to the bars and crushing the rest to sprinkle on top
  • The recipe recommends not chilling the bars in the fridge before cutting into squares, but I didn't have any issues cutting even when it was completely cold

Tuesday, July 22, 2014

Cubicle kitchen: Quinoa Chocolate Cupcakes

When it comes to recipes that are healthy or accommodate some kind of special dietary requirement, I prefer those with two qualities:
  1. They don't require ingredients whose purpose is solely for that dietary requirement.
  2. They taste good enough that people with no desire to be healthy crave them.
That means that I tend to stay away from gluten-free recipes that use fancy flours.  Yes, I would like to one day experiment with them just to see what they are like, but my baking pantry is bursting enough with just all-purpose, cake, self-rising, and whole wheat flours, I don't really have room for others.  Things like corn meal, oatmeal, and quinoa I already have on hand, so I tend to seek out recipes that utilize those.

And of course, describing a baked good as primarily 'good for you' is like describing a potential blind date as having a good personality.  It may very well be true, but it's not the first impression that's going to inspire a first bite or a first date.

These cupcakes meet both of my requirements perfectly.  First of all, it uses leftover cooked quinoa, so it's perfect for dessert after making some stuffed tomatoes.  And because you blend the quinoa, you end up with a gorgeously moist cake that reminds you of a decadent flour less chocolate cake, the ultimate example of something that is gluten-free practically as an afterthought.  

Plus, being quinoa, it's not just about the lack of gluten.  It's also about being a superfood with lots of protein and qualities that allow you to feel completely self-righteous as you lick frosting from your lips.

Quinoa Chocolate Cupcakes
Adapted from A Dusting of Sugar: Chocolate Quinoa Cake

Ingredients
  • 2 cups cooked quinoa
  • 1/3 cup almond milk
  • 4 eggs
  • 1 teaspoon vanilla
  • 3/4 cup butter, melted and cooled
  • 1 cup sugar
  • 1/2 cup plus 1 Tablespoon unsweetened cocoa
  • 3/4 cup sweetened cocoa (hot cocoa mix)
  • 1 1/2 teaspoon baking powder
  • 1/2 teaspoon baking soda
  • 1/2 teaspoon salt
Directions
  1. Preheat oven to 350°.
  2. Combine milk, eggs, and vanilla in a large bowl.  Add quinoa and butter.  Using an immersion blender, blend until smooth.
  3. In a separate bowl, mix sugar, cocoas, baking powder, baking soda, and salt.
  4. Add dry ingredients to wet mixture and stir until combined.
  5. Divide evenly between cupcake liners, about half full.
  6. Bake for 18-20 minutes, until a toothpick inserted into the center comes out clean.
  7. Allow to cool completely before frosting.

For frosting, make a double batch of cdkitchen: Easy Cocoa Frosting

Thursday, July 17, 2014

Cubicle kitchen: Pomegranate Chocolate Quinoa Cookies

Even though I'm never the first to try one of the new food trends, I do get there eventually most of the time.  Especially when it comes to overnight health sensations.  So forgive me, because there's going to be a lot of quinoa coming up in my cubicle kitchen.

I told you about my quinoa-stuffed baked tomatoes the other week.  Well, after filling the tomatoes with not just quinoa but onions, spinach, and an egg, there was still plenty of quinoa left for other purposes.  And by other purposes, I usually mean baking treats.  Turns out, there are all kinds of uses for quinoa in goodies, and for the most part you can treat it like you would oatmeal.  As in, when making oatmeal muffins, substitute the same amount of cooked quinoa for the uncooked oatmeal called for.

Because I also had some pomegranate arils collected, I decided to go with a cookie packed with healthy excuses to eat one more.  Between the vitamins in the pomegranate, the antioxidants of dark chocolate, and quinoa's protein power, this is practically health food.  Since breakfast cookies also seem to be pretty trendy, I think you could pass these off as one of those too.

Pomegranate Chocolate Quinoa Cookies
Recipe from hidden ponies: Chocolate Pomegranate Oatmeal Cookies

My notes:
  • I chopped up Brookside Dark Chocolate Pomegranate instead of just chocolate chunks to amp up the pomegranate factor
  • I substituted equal amounts of cooked quinoa for quick-cooking oats
  • The quinoa makes the cookies really moist, to the point of falling apart; I would suggest maybe adding a little flour, or some of the originally called for oatmeal, and cooking for a few more minutes or perhaps cooking them in a mini muffin tray for soft cookie bites
  • I used an ice cream scoop to get these onto the sheet because the dough is quite wet
  • Some cookies don't need the two inches of space between them on the cookie sheet, but these definitely do because they spread quite a bit

Thursday, July 3, 2014

Cubicle kitchen: Red Velvet Cookies

I bake a lot of sweet treats, but because a blogger cannot survive on cupcakes alone, I also like to do some savory cooking.  It's just not as varied.  For klatch I try to come up with something new every week, either completely or some kind of variation.  My dinners, though, tend to be a rotation of simple favorites.  Steamed broccoli with melted cheese, oven-roasted zucchini, spaghetti squash with tomato sauce...no, I'm not vegetarian, I just like my veggies.

I also am a firm believer in this truth: everything is better with an egg on it.  So when my mom and I heard about a recipe for stuffing tomatoes with spinach and quinoa, we liked it.  When we realized we could also crack an egg in there, we had to try it.  We scoped out a few recipes for tomatoes stuffed with quinoa, or tomatoes with eggs baked inside, and decided that we could mostly just wing it.  We cooked up some quinoa, sautéing spinach with onions and garlic, coring out some ginormous tomatoes and filling them as we saw fit with both of those, along with some cheese and egg.

The results?

Delicious.

What does this have to do with Red Velvet Cookies?  Well, while purchasing the produce for the tomatoes, I spied some avocados and remembered that you could also fill those with eggs and bake them.  So we bought avocados as well, but that never made it into the roster of zucchini, squash, and broccoli.

Instead, I decided to try using them as a substitute fat in baking.  The cake mix I grabbed from a clearance end cap in Target.  I figured that, like chocolate, red velvet was a strong enough flavor that you wouldn't realize that there was avocado in there.  Because the mix asks for oil rather than butter, substituting is a little more complicated, because avocado isn't as moist.  So rather than attempting to make the original cake or cupcake, I went with the more texturally-forgiving cookie.

I also didn't attempt to replace the oil in the frosting mix with avocado, because you would definitely notice that tinge of green in the crisp of white cream cheese-flavored frosting.  I did still make a substitution, melted Brummel and Brown spread, but that's not particularly innovative.

To make these perfect for 4th of July, I would suggest either topping with a blueberry or blue star sprinkles.

Red Velvet Cookies
Adapted from Kirbie Cravings: 3 Ingredient Avocado Chocolate Cookies
Makes about 2 1/2 dozen cookies

Ingredients
  • Pillbury Supreme Collection Red Velvet Cake Mix

Instead of add-ins called for on box for cake*:

  • 1/2 cup mashed avocado
  • 1/4 cup (1/2 stick) butter, softened

*Use additional ingredients as called for on box for frosting

Directions

  1. Preheat oven to 350°.
  2. Cream together avocado and butter.
  3. Mix in cake mix until dough forms.
  4. Roll dough into 1" balls and place on parchment-lined cookie sheets.  Flatten balls slightly with glass or other flat-bottomed tool.
  5. Bake for 10-12 minutes, until top and edges are set.  Allow to cool for several minutes before moving to rack to cool completely.
  6. When cookies are cooled, assemble frosting as directed on box.  Frost cookies.

Friday, June 27, 2014

Cubicle kitchen: Gingerbread Truffles

I don't have any FOs this Friday, but I do still have some catching up to do on my reporting of baked goods, so here's last week's.

This is one of those times when I feel slightly sheepish about calling this a 'recipe'.  Mostly what it boils down to is that the principles of the still-going-strong trend that is cake balls, or cake truffles (which just sounds so much nicer), can also be applied to gingerbread, with delicious results.

What's more, because of the dense nature of gingerbread, you don't need to induce any further guilt by adding a lot of extra frosting into the mix.  Just the crumbled up gingerbread itself holds together well enough to be rolled in this gingerbread-flavored candy coasting, which had a bit of a butterscotch taste to it, but still delicious.  Especially with a nice, milky chai.

Gingerbread Truffles
Makes about 30 truffles

Ingredients
  • 1 boxed Gingerbread mix, and additional ingredients as called for
  • 1 bag gingerbread-flavored candy melts
Optional:
  • 1/4 cup frosting
  • 1/2 cup crushed Pfeffernusse
Directions
  1. Bake gingerbread according to directions for cakey, rather than cookie, gingerbread.  Allow to cool enough to handle.
  2. In a large bowl, tear the gingerbread into pieces.  If you think your gingerbread could use some additional moisture to hold together, add some frosting.  Otherwise, just dive in with both hands and squish the gingerbread together.  Form into balls about the size of a tablespoon.  Place on a tray lined with parchment paper and freeze.  I let them freeze overnight.
  3. When ready to assemble, melt the candy melts according to directions.  I prefer to do smaller batches and add additional melts as needed, just in case I don't need all of it.  Arrange your workspace so you have your chilled balls, melted 'chocolate', and any toppings you want to roll the truffles in close by.  Also: somewhere to place your finished truffles to set.  I simply used the same try that the balls had been frozen on.
  4. Dip each ball in candy melt, coating completely, then roll half in topping, and place back onto the tray.  This will have to be done fairly quickly, as the coating will begin setting relatively quickly, so you need to get the topping applied and your fingers off of it before that happens.
  5. Repeat until all of the balls are coated, or you are out of coating.  Allow truffles to set, then transfer to an airtight container until ready to serve.

Monday, June 23, 2014

Cubicle kitchen: Scrambled Cadbury Cream Egg Cookies

I love Cadbury Creme Eggs.  I am not alone in this.  Recently, one of my favorite food bloggers, Vanilla Sugar, recently tweeted:
Amazing how fast the weight comes off when you drop ice cream, Cadbury Eggs & strawberry shortcake from your diet. No?
Indeed it is.

I still have a precious few Cadbury Creme Eggs stashed away in my freezer from this season's Easter haul.  That's my preferred way to eat them: fresh from the freezer, with the chocolate hard enough that I can bite into it to crack it and then eat the little shards while saving the creamy center for last.  Freezing them is the only way for the center to still be relatively intact and not completely all over my fingers by the end.

There are two ways to look at why I made these cookies.  The first is that I generously sacrificed part of my Creme Egg stash for the sake of the tastier klatch good.  The second is that I just wanted to see if it would work and was once again experimenting on my coworkers' taste buds.

I'm going to go with a little bit of both.  Either way, these are yummy.  I like Sally's recipe because the cookie is soft and fluffy, which pairs really well with the milky chocolate shell and fondant creme.

Scrambled Cadbury Creme Egg Cookies
Recipe from Sally's Baking Addiction: THE Chocolate Chip Cookie

My notes:
  • Instead of chocolate chips, I chopped up about 8 Cadbury Creme Eggs and mixed those into my cookie dough.
  • To chop up the Creme Eggs without making a gooey mess, place the eggs in the freezer at least overnight.

Tuesday, June 17, 2014

Cubicle kitchen: Monster Blondies

After my foray into wittily-named baked goods, I started thinking of these as 'Zombie Marilyns', but I already had to explain what Monster Blondies were, so getting any more witty would have negatively impacted understanding.  And since my work is all about creating understandable, usable content, it would be ironic for me to name these something that confused them and kept them from being able to eat them.

Basically, I took smitten kitchen's wonderful base recipe for infinitely adaptable blondies and overloaded it with even more add-ins than she allows for (making them into monsters), then used a much larger pan to make them thinner.  They end up a little more like thick cookie bars than brownies.  But really, I'm not sure where the line is drawn between blondies and cookie bars.  They are moist like fudgy brownies, but with the slight chewiness of a cookie.  Making them thinner also allowed me to slice them into long, narrow triangles rather than the usual small square.

I also tried to get a little cute with my photo for these treats.  Since they had 'Monster' in the name, I wanted to take their picture with my own knitted monster, Union Jack.  And because I had cut them into triangles, it seemed like a fun idea to arrange them like bunting for a little monster party.  Here's the best picture I was able to take:

Now, while I think this is adorable, it's not really the best way to feature the recipe.  So I took a slightly more boring but informative photo as well.  I'm just going to have to rely on the colors of the Mini M&Ms to draw you into the deliciousness.


Monster Blondies
Recipe from smitten kitchen: blondes, infinitely adaptable
Makes a 9" x 13" pan

My notes:
  • I added about 1 1/2 cups assorted chocolate candies: Mini M&Ms, chopped Snickers, Brookside Dark Chocolate Pomegranate, some nuts, etc. 
  • I baked my blondies in a 9" x 13" pan lined with parchment paper. This is about twice the size of the pan originally used, so you get a thinner blondie that's more like a thick cookie bar than a blond brownie.
  • I cut my pan of blondies in half longwise and then sliced narrow triangles from that.
  • I also substituted about half of the all-purpose flour for whole wheat flour.  You know, to make it healthy.

Sunday, June 8, 2014

Cubicle kitchen: Chuckledoodles

Normally I would give these a 'real' name and save the witticisms for my own inner giggles, but I just love this one too much.

It was a while ago that I reduced root beer into something like corn syrup.  After making Creamy Root Beer Float Bars, I was waiting for another good way to transform a recipe that used regular corn syrup and give it some root beer edge.  It needed to be something that took advantage of the root beer, not something where there was just a tablespoon of syrup and no one would be any the wiser.

What I love about these is that they take the innate spiciness of root beer and translate it into a cookie that's traditionally a different kind of spicy: the snickerdoodle.  Where those are usually cinnamon sugar coated, I thought that the addition of clove would bring out some of the sassafras-ness of the root beer. Because these don't have any egg, they are more chewy and dense than the snickerdoodles I usually have.  But I think that would make them perfect for topping with some frothy frosting, or sandwiching around some ice cream.

Because I am never not thinking about a root beer float.


Chuckledoodles
Adapted from Karo Syrup: Alphabet Cookies
Makes about 3 dozen

Ingredients
  • 1/2 cup butter, softened
  • 1/2 cup reduced root beer*
  • 1/2 cup sugar
  • 1/4 cup creamy peanut butter
  • 1 teaspoon vanilla extract
  • a pinch of salt
  • 2 1/2 cups all-purpose flour
  • 1/2 cup sugar
  • 1/4 teaspoon ground clove
  • 1/4 teaspoon cinnamon
* To reduce root beer: pour several cans of root beer into a heavy-bottomed pan and simmer until it has reduced to the consistency of corn syrup, stirring occasionally and making sure it doesn't burn.

Directions
  1. Cream butter and peanut butter with reduced root beer and sugar.  Mix in vanilla extract and salt.
  2. Mix in flour until combined.  Place dough in the fridge if needed to make it more workable.
  3. Preheat oven to 350°.  In a small bowl, combine sugar and spices.  
  4. Form dough into balls (about a tablespoon per ball) and roll in sugar spice mixture.  Place on cookie sheet and flatten using the bottom of a glass or jar.
  5. Bake for about 15 minutes until the edges are golden and have set.  Allow to cool on the pan for a few minutes before transferring to a wire rack.

Monday, June 2, 2014

Cubicle kitchen: Caramel Applesauce Bread Pudding

The other week I went down to Lockhart to try just one of the famous BBQ joints, Kreuz Market.  They are a no-frills place, with no sauce and no forks.  But they do give you a handful of slices of white bread and saltine crackers to go with your meat.  I prefer to go with other sides, like coleslaw and sauerkraut, though, so I always have bread leftover.  Not one to waste, I decided to make another bread pudding.

When it comes to homemade versus store-bought, I'm adorably unpredictable.  Which is why the applesauce in this bread pudding is homemade, but some of the "bread" is actually store-bought muffin breakfast bars.  I've discovered that applesauce is the perfect way to use up apples that have lost their crunch.  Just chop them up (I don't even bother peeling), cook down with a little liquid, then blend down.  Sometimes I even mix in some other fruits for a berry applesauce.  Yum!

But if you have some leftover homemade muffins and store-bought applesauce instead, that works too.  I would use unsweetened, though, because the caramel and other sugar already makes these sweet enough. 


Caramel Applesauce Bread Pudding
Makes 2 dozen cupcake-sized servings

Ingredients
  • 7-8 cups torn pieces of leftover white bread and croissants*
  • 3 cups torn pieces of muffin bars, or leftover muffins
  • 3 eggs, lightly beaten
  • 1 cup buttermilk
  • 1 cup unsweetened vanilla almond milk
  • 1 Tablespoon vanilla extract
  • 1 cup applesauce, divided in half
  • 1 pouch dulce de leche white hot cocoa mix
  • About 1/8 cup white sugar (enough to make a full 1/2 cup when combined with cocoa mix)
  • A pinch of salt
  • 6 pieces of soft caramel, chopped
* 6-8 slices of white bread and 3 mini-croissants

Directions
  1. In a very large bowl, combine breads and muffins.  Set aside.
  2. In another bowl, stir together eggs, milks, extract, half of the applesauce, cocoa mix, sugar, and salt.
  3. Pour wet mixture over the breads and muffins, mixing so that the liquid is as evenly distributed as possible.  Place in the fridge and allow to absorb for at least an hour.
  4. Preheat oven to 350°.
  5. Fill each lined muffin cup about halfway with the bread pudding mixture. Place a spoonful of applesauce and a few bits of caramel in each cup, then top with another spoonful of bread pudding.
  6. Bake for about 30 minutes, until a toothpick comes out mostly clean.  Cool on a wire rack.

Tuesday, May 20, 2014

Cubicle kitchen: Owl Blondies

First of all, I want to give a congratulatory shout-out to myself and all of the bloggers who participated in the 5th Annual Knitting & Crochet Blog Week.  A particular shoutout to Eskimimi Makes for putting it all together.  I had a lot of fun, and it's really making me think about the possibilities for blending a little more fiction (and composed non-fiction) into my blog.  And, of course, it has me remembering all of the craft promises I've been making to myself and my stash.  Hopefully I'll be fulfilling them soon.

Second of all, I've been doing a little spring cleaning around my room, and speaking of stashes...I have collected a lot of magazines over the years.  I fulfilled my role as a stereotypical teenage girl and consumed my fair share of magazines.  And then I saved them all (fashion, beauty, fitness, even home and gardening!) for the purposes of collage.  Except I haven't found the time to do a lot of the application of the images to paper.  Maybe that should be one of my goals, to tear apart a magazine and toss the remnants regularly.  Just what I need, another goal.

Third of all, the reason for this post: a recipe!  I'm a firm believer in the melted ice cream cake, but this was my first time making melted ice cream blondies.  I'm happy to report that it works just as well.  I had two pints of Ben & Jerry's that each had just enough left in them to replace the butter in these blondies.  Because the flavors were peanut butter-y, I threw in some chopped nuts, which I also had on hand in my just-enough-to-bake-with inventory.

I guess what magazines used to be to me, baking accessories now are, because I could not resist this owl pan.  Except that unlike the magazine collages, these blondes actually did get made.  And eaten.


Owl Blondies
Adapted from smitten kitchen: blondes, infinitely adaptable
Makes a dozen

Ingredients

  • 1/2 cup melted ice cream*
  • 1 cup unpacked brown sugar
  • 1 large egg
  • 1 teaspoon vanilla
  • 1/2 cup chopped nuts, mixed (optional)
  • 1/8-1/4 cup powdered sugar
  • a handful of M&Ms

*I used a mix of Ben & Jerry's Peanut Butter Jam Session and Banana Peanut Butter Greek Frozen Yogurt

Directions

  1. Preheat oven to 350°.
  2. In a bowl, mix together melted ice cream and brown sugar.  Add egg and vanilla, mix until combined.  Finally, mix in nuts.
  3. Prepare owl pan by coating with non-stick spray.  Fill each well about 3/4 full.
  4. Bake for about 10 minutes, until middle is set and edges are golden.  Allow to cool for a few minutes before carefully removing from pan and transferring to wire rack.
  5. In a small bowl, mix powdered sugar with just enough water to create a glaze.
  6. Using a fork, drizzle a dot of glaze onto the eyes of each owl and press an M&M in place.  Then, place another dot on top of the M&M.
  7. Drizzle glaze over owls to highlight beak, feet, and a zig-zag of feathers.

Friday, May 9, 2014

Cubicle kitchen: Coconut Lime Cereal Treats

We had a sort of a picnic lunch last Friday at work, so for part two of my coconut, lime, and Chex adventures I made some cereal treats.  They fit all of my criteria for an outdoor potluck: easily transportable, easily eaten, and not affected by temperature.  Plus, hey, it's gluten-free!

I'm starting to think that Rice Krispies really are the best cereal for making cereal treats.  My Big Red Treats were intriguing (mostly because it was cereal that tasted like Big Red soda), but the spherical shape didn't lend itself to sticking together.

These cereal treats, similarly, taste yummy, but the squares of the Chex make it hard to really pack a solid bar of treats.  That made the treats a little loose and crumbly in places.  Perhaps if I crushed some of the cereal ahead of time, that would help.  Some extra marshmallows might also help to provide extra 'glue'.  So if you want to try these, you might want to just go for all Rice Krispies.  In which case, you'll probably just need six cups.

No matter what cereal you use, they will taste good.  I really like using the Kool-Aid in the treats and the glaze, it gives them a sour kick.  I'm thinking that for Halloween I might make some orange ones, then I can call them Rice Krispy Trick or Treats.


Coconut Lime Cereal Treats
Makes a 9x13" pan

Ingredients
  • 1 bag lime marshmallows
  • 1/4 cup butter, melted
  • 3 cups Rice Krispies
  • 2 cups Corn Chex
  • 2 cups Rice Chex
  • juice and zest of one lime
  • 1 cup shredded coconut
  • 1 packet unsweetened Lime Kool-Aid
  • 1 -1 1/2 cup powdered sugar

Directions
  1. In a large, microwave-safe bowl, combine marshmallows and butter.  Microwave for 30 seconds at a time, stirring in between, until the marshmallow has completely melted. (Alternately, you could use a large pot on the stovetop over medium-low heat, stirring, then removing from heat when melted.)
  2. Quickly stir in cereal, coconut, lime zest, and half of the packet of Kool-Aid.  Mix until cereal is completely coated.
  3. Transfer mixture into a 9x13" pan lined with parchment paper (or two smaller pans), smoothing down with a spatula.
  4. In a small bowl, mix together powdered sugar, lime juice, and remaining Kool-Aid.  Add powdered sugar or water as needed to achieve glaze consistency.  Drizzle over treats.  Can sprinkle additional coconut on top if desired.
  5. When treats and glaze have set, cut into squares.

Monday, May 5, 2014

Cubicle kitchen: Crunchy Coconut Lime Cookie Cups

One of the things I love about baking is that there's an infinite number of possibilities.  When you walk into the kitchen, you can not only mix and match the ingredients, you can also switch up how you bake them to create something new each time.

Last week, I made two treats from three main ingredients:

  • Coconut
  • Lime
  • Chex cereal

These cookie cups are the first result.  The Chex adds a crunch to what is basically a sugar cookie recipe that is pressed into a mini cupcake pan to create little tartlets.  The filling I just kind of threw together, adding powdered sugar and corn starch to thicken up the condensed milk a little more so that you can safely take two bites to eat them without losing any of the creamy gooey deliciousness.  Then the coconut and lime comes in to make these a tasty way to ease into the realization that it's practically already summer and where is the year going?

Plus extra crushed Chex, because more Chex means more crunch, and more crunch is always good.


Crunchy Coconut Lime Cookie Cups
Makes 4 dozen

Ingredients

Cookie cups:

  • 1 cup butter, room temperature
  • 1 cup sugar
  • 2 eggs
  • 2 teaspoons vanilla extract
  • 1 teaspoon baking powder
  • 3/4 teaspoon salt
  • 2 cups flour
  • 4 cups Chex cereal*, crushed (ended up measuring about 2 1/2 cups when crushed)


Filling:

  • 1 14 oz can sweetened condensed milk
  • 3/4 cup shredded coconut
  • juice and zest of one lime
  • 1/2 cup powdered sugar
  • 2 Tablespoons corn starch
  • 1 cup Chex cereal, crushed*


*I mixed equal parts Rice and Corn Chex

Directions

  1. Preheat oven to 350°.
  2. In a large bowl, cream together butter and sugar until fluffy. Add eggs and extract and combine.
  3. Add the baking powder, salt, and flour to the wet batter and mix just until combined.  Mix in crushed cereal.
  4. In a well-greased mini cupcake pan, scoop an spoonful of batter, pressing slightly to create a well in the center of each.
  5. Bake for about six minutes, then remove from the oven and (carefully) re-press the well into the half-baked cookie using the other end of a wooden spoon.  It will have risen slightly in the oven.  
  6. Return to the oven for another 5 minutes or until golden.  Remove from the oven and allow to cool before removing from pan.  Set cookie cups aside.
  7. In a bowl, stir together all of the ingredients for the filling.  Spoon into the cookie cups.


Friday, May 2, 2014

Cubicle kitchen: Cheese Fudge Brownies

I know that the 'rules' of good grocery shopping dictate that you should go in with a list, and come out with only what was on that list.  And I do make lists to make sure that I don't get home and realize that I've forgotten the eggs or anything, but part of the fun for me is exploring the aisles and seeing what they have.  You never know what you're going to find: multigrain and pretzel croissants in the bakery, bubble gum sparkling water in the soda aisle, and chocolate cheese fudge in the deli section.  All of these are real items that I have discovered and purchased from the grocery store.  And not even from a fancy one like Whole Foods, just the regular old HEB.

But so far the chocolate cheese fudge is the only one of those to make it into my baking.  It was on clearance, and it was just too intriguing not to try.  I sliced off a little to try as-is; it was like a creamy fudge you might get from a fudge shop, but not nearly as sweet.  Tasty enough, but I couldn't imagine finishing the entire block myself, so I decided to bake it into something.  Exactly what I wasn't sure, because I wasn't sure what the texture of a melted cheese fudge would be like.  Which is why I ended up settling on brownies, because it wouldn't really matter if the pieces of fudge completely melted away or stayed as chocolate chip-like chunks.

The result was somewhere in between, making these extra-moist and creaming brownies.  Using a chocolate extract I found in a local spice shop also added to the chocolate factor, especially aromatically.  So even though they look like one of my more straight-forward treats, there's always something different going on.

Do you ever just grab something from the shelves because you wonder what it's like?  Any success or horror stories?


Cheese Fudge Brownies
Adapted from Ghiradelli's Award Winning Brownies (from the back of a can of cocoa)
Makes 1 pan

Ingredients
  • 1/2 cup butter, melted and slightly cooled
  • 1/2 cup sugar
  • 3/4 cup sweetened cocoa mix
  • 2 eggs
  • 1 teaspoon chocolate extract (can substitute with vanilla)
  • 2/3 cup all-purpose flour
  • 1/4 teaspoon baking powder
  • 1/4 teaspoon salt
  • 1 block Kelly's Kitchen Chocolate Cheese Fudge, chopped into chunks

Directions
  1. Preheat oven to 350°.
  2. Mix together butter with sugar and cocoa.  Add eggs and extract, stir to combine.
  3. Sift together flour, baking powder, and salt.  Mix in the dry ingredients and stir until combined.
  4. Fold chunks of cheese fudge into the batter.
  5. Spread batter into a prepared 8" or 9" pan.  Bake for 25-30 minutes.
  6. Allow to cool before cutting into squares.

Monday, April 28, 2014

Cubicle kitchen: Mocha Cream Pie

Baking for someone can sometimes be as tricky as buying them a present, in that it's hard to know what they really want.  And all they can offer you is that they'll love whatever you give them.  So when one of my coworkers announced that he was going to leave, I had to do some thinking to figure out what kind of dessert to bring to his going-away lunch.  Because obviously I was going to bring something.

The only hint I had as far as flavors was that he had headed straight for some java chip cookies at a recent event where we had all been lured in with cookies in exchange for participation.  So I knew that I needed some kind of coffee buzz.  And then, because it was a lunch event rather than the usual coffee klatch, I decided that it was the perfect time to whip up a pie.  People would already have their own plates and forks, so all I needed was the pie and a server.

From there, I took inspiration from a couple of places, like the Kraft recipe for Fudge-Bottom Candy Crunch Pie and Cupcake Project's How to Bake with Coffee post.  After putting various ideas together and playing around with what I had in my pantry, I ended up with something unique.  It's a give and take of shortcuts (pudding mix, pre made pie crust) and techniques that make it special (steeping the coffee beans, whipping the cream).  And adding a bar of chocolate never hurts.

I wouldn't want to send anyone away from the team hungry, after all.


Mocha Cream Pie
Makes 1 pie

Ingredients
  • 1 prepared pie crust, cooled*
  • 2 cups milk (I used 1%)
  • 1 cup coffee beans (not ground)
  • 1 Tablespoon instant coffee
  • 1 4-serving package of non-instant vanilla pudding mix
  • 1 bar Chocolove Coffee Crunch in Dark Chocolate, chopped and divided
  • 1 1/2 cups heavy whipping cream
  • 4 Tablespoons powdered cappuccino mix

* You can use your favorite recipe, buy the crust to roll or already in the shell (mine was in the shell).  You could also substitute a graham cracker or cookie crumb crust if desired.

Directions
  1. In a medium saucepan, combine milk and whole coffee beans.  Over a medium heat, bring to a simmer.  Then turn off the heat, cover, and allow beans to steep in the milk for about 15 minutes.
  2. Strain the milk, discarding the coffee beans and returning the milk to the saucepan.  Put the heat back on low.  Add the instant coffee and pudding mix, stirring.  
  3. When the pudding is thick, add about 2/3 of the chopped chocolate bar to the pan and stir until the chocolate has melted.
  4. Pour the pudding mixture into the pie shell and allow to cool.  Place in the fridge to set for a few hours or overnight.
  5. Soon before serving, pour the whipping cream into a bowl with the cappuccino mix and beat until soft peaks form.  
  6. Cover the pie with the cream, and sprinkle the remaining chocolate on top as a garnish. Serve immediately or chill in the fridge.

Monday, April 21, 2014

Cubicle kitchen: Lemon Poppyseed Pound Chicks

Did anyone hunt for Easter eggs yesterday?  We had a mini-hunt in the living room for four Cadbury Cream Eggs and eight Lindt Chocolate Carrots.  All the fun without the dirt or the actual eggs.

And no Peeps.  Ever since I figured out how to make my own marshmallows, they just don't hold the same mystique they used to.  And to be honest, they were always sort of like candy corn to me.  One was festive, but I didn't really crave more than that.  But they still look darned cute, so when I found a Chicago Metallic Chick Silicone Mold in Target, I kind of had to.

You could probably half this recipe to just make a dozen chicks, but I made the full batch with cupcakes and mini baked donuts for the remainder to make sure I had enough to bring into the office.  I'll have to think of an excuse to make more bird baked goods, because the only problem I had with these was people's reluctance to eat something so cute!


Lemon Poppyseed Pound Chicks
Adapted from Sweet Pea's Kitchen: Lemon Poppyseed Pound Cake
Makes 12 Peep cakes and 12 cupcakes

Ingredients

  • 1 cup (2 sticks) unsalted butter, softened
  • 1 1/4 cups sugar 
  • 4 large eggs
  • 2 tablespoons grated lemon zest
  • 2 teaspoons juice
  • 1 teaspoon lemon extract
  • 1/2 teaspoon vanilla extract
  • 1 1/2 cups cake flour
  • 1 teaspoon baking powder
  • 1/2 teaspoon salt
  • 1/3 cup poppy seeds, plus additional for sprinkling
  • A few cups powdered sugar and a few tablespoons lemon juice for glaze (your needs will vary)


Directions

  1. Preheat oven to 350°.
  2. In a bowl, cream together butter and sugar.  Mix in eggs, zest, juice, and extracts.
  3. Sift together flour, baking powder, and salt.  Add to wet ingredients, mixing until combined.  Mix in poppy seeds.
  4. Fill cake mold according to directions.  I filled a plastic bag with batter and cut the tip off to pipe it in 3/4 of the way.  If desired, remaining batter can be used to fill about a dozen cupcakes and be baked at the same time.
  5. Bake for 25-30 minutes (the cupcakes will take less time).  Allow to cool before attempting to remove from mold.
  6. When cakes have been released from the mold, place them on a wire rack set on a cookie sheet lined with parchment paper.  Mix powdered sugar with lemon juice to get a glaze consistency.  Drip and spread the glaze over the entire top of each cake, sprinkling with additional poppy seeds.  Allow glaze to harden before serving.